2026-09-11
Choosing a drill bit can seem like a small decision. In practice, it can affect how smoothly a drilling task goes. This becomes more important when an SDS bit is being considered for a hammer drill.
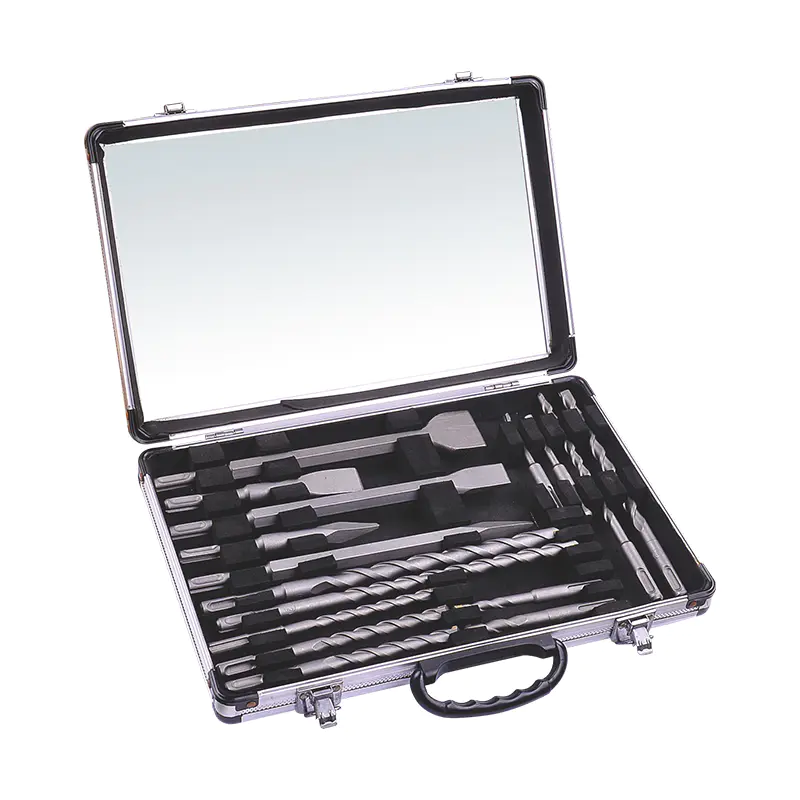
SDS bits are commonly associated with masonry work. They are designed around a particular type of tool connection and are often used for materials such as concrete, brick, and block. A compatible hammer drill can make use of this design for tasks that require more than ordinary drilling.

The important point is compatibility. An SDS bit is not simply a different-looking version of a standard drill bit. Its connection is designed for a matching tool system. A user should understand how the bit and drill work together before starting a project.
This matters for professionals and occasional users alike. A maintenance worker may already have several drill bits in a toolbox. A DIY user may be familiar with a regular drill but less familiar with SDS equipment. Knowing the difference can prevent an unsuitable combination from being used.
The connection between a bit and a drill is easy to overlook. Many drill bits may look similar when placed next to one another. Their shank designs can be very different.
An SDS bit is intended for a compatible SDS tool connection. A regular drill chuck does not automatically accept every SDS bit. The tool needs to be designed to work with the particular bit system.
This is why users should check the tool before buying or installing a bit. Looking only at the bit diameter or overall appearance is not enough.
The same principle applies when replacing a worn bit. A user may already own a drill and simply want to purchase a new bit. The correct approach is to identify the tool's connection system and then choose a matching bit.
A quick compatibility check can save time and prevent frustration.
| Item to Check | Why It Matters |
|---|---|
| Tool Connection | Determines Which Bit Systems Can Be Used |
| Bit Shank | Needs to Match the Tool Connection |
| Material | Helps Determine Whether an SDS Bit Is Suitable |
| Drill Mode | Should Match the Intended Task |
| Bit Condition | Affects Handling and Drilling Experience |
| User Instructions | Provide Guidance Specific to the Tool |
Compatibility is not just a purchasing concern. It remains important when setting up the drill for each job.
The most noticeable difference is the shank. Instead of relying on the same smooth shape found on many standard drill bits, an SDS bit has a specialized connection designed for an SDS-compatible tool.
This allows the bit to work with the movement of the tool during hammer drilling.
The design also makes changing compatible bits convenient. Users do not necessarily need to treat an SDS bit like a conventional bit that is tightened into a standard chuck.
Different SDS systems exist, so the term "SDS" should not be treated as meaning every SDS bit fits every SDS tool. Users need to identify the system supported by their drill.
This is particularly important when shopping online. Product descriptions may contain several similar terms. A buyer who focuses only on the word "SDS" may overlook the actual compatibility information.
The safest approach is simple. Check the drill instructions, identify the supported bit system, and then select the appropriate bit.
No. The phrase "hammer drill" covers a range of tools, and not every hammer drill uses the same bit connection.
Some hammer drills are designed around a standard chuck. Others are designed for SDS bits. There are also tools that support different connection arrangements through specific accessories.
This difference can create confusion for new users.
A person may see the words "hammer drill" on a tool package and assume an SDS bit will fit. That assumption can lead to an unsuitable setup.
The drill's connection should be checked before the bit is selected. If the tool is not designed for the SDS system, an SDS bit should not simply be forced into the chuck.
Adapters may exist for certain tools and applications, but users should follow the tool manufacturer's instructions rather than assuming an adapter makes every combination appropriate.
The key question is not only, "Is this a hammer drill?" It is also, "What type of bit connection does this hammer drill support?"
That distinction can make the selection process much clearer.
SDS bits are widely associated with masonry drilling. Concrete, brick, and block are common examples.
These materials behave differently from wood or many softer materials. They can create dust and resistance during drilling, and the drilling approach needs to match the material.
An SDS bit may be useful when the job involves masonry and the tool is designed for that type of work.
That does not mean an SDS bit is automatically suitable for every material. Using a masonry bit for a material that requires another type of bit can lead to poor results or unnecessary wear.
Users should identify the material before choosing the bit.
For example, a small home improvement project may involve drilling into a masonry wall to install a fixture. Another project may involve wood framing nearby. These two surfaces may require different bits even when they are part of the same project.
| Material or Surface | Bit Selection Consideration |
|---|---|
| Concrete | Consider a Bit Intended for Masonry Drilling |
| Brick | Check Whether the Bit Suits the Brick and Task |
| Block | Select Equipment Appropriate for Masonry |
| Wood | A Wood-Specific Bit May Be More Suitable |
| Metal | Use a Bit Intended for Metal Drilling |
| Mixed Surfaces | Identify Each Material Before Drilling |
Material identification should happen before the drill is switched on. It is a small step that can influence the entire job.
Having the correct bit is only part of preparation. The drill also needs to be used in an appropriate mode.
Many drills offer different operating options. A standard drilling mode and a hammering mode are intended for different tasks. Some tools may also provide additional functions.
The user should refer to the tool's instructions before selecting a mode.
For masonry drilling, the appropriate hammer function may be required when the tool is designed to use it. For other materials, a different setting may be more suitable.
This is an area where beginners can easily make mistakes. They may assume that attaching an SDS bit automatically means the tool should be used in hammer mode for every task.
The bit and material should be considered together with the tool setting.
A simple preparation routine can help:
This approach keeps the setup straightforward without turning a routine job into a complicated process.
A bit should be inspected before it goes into the tool.
Look at the shank and working end. Dirt, damage, or unusual wear can affect the way the bit fits and performs. If the bit appears damaged, it should not be treated as ready for use.
The tool connection should also be clean and in suitable condition. Dust and debris can collect around tools used for masonry work. Keeping the connection area clean can make bit changes easier and help maintain proper engagement.
Installation should follow the instructions supplied with the drill.
Users should never force a bit into a connection that does not accept it naturally. If the bit does not fit, the issue may be a compatibility problem rather than a lack of force.
After installation, the user should confirm that the bit is properly engaged before beginning work.
This is especially important for people who are new to SDS tools. The connection can feel different from a standard drill chuck, so it is worth becoming familiar with the mechanism before starting a real project.
Many problems come from simple assumptions rather than complicated mistakes.
One common issue is buying a bit based only on size. A bit can have the desired working size and still be incompatible with the drill.
Another mistake is confusing different SDS systems. The word "SDS" alone may not provide enough information. The exact tool and bit connection should be checked.
Using the wrong operating mode is another concern. A drill should be operated according to the task and the instructions for the tool.
Users may also continue using a damaged or heavily worn bit. A bit that no longer appears to be in suitable condition should be replaced rather than pushed through another job.
Cleaning is easy to overlook. Masonry work can produce dust and debris, so the bit and tool should be cared for according to the relevant instructions.
The table below highlights several common issues.
| Common Mistake | Better Approach |
|---|---|
| Choosing Only by Bit Size | Check the Complete Compatibility |
| Assuming Every Hammer Drill Accepts SDS Bits | Identify the Tool Connection |
| Mixing Different SDS Systems | Confirm the Exact System Supported |
| Ignoring the Material | Select a Bit Suited to the Surface |
| Using an Unsuitable Drill Mode | Follow the Tool's Operating Guidance |
| Continuing with a Damaged Bit | Inspect and Replace When Needed |
| Neglecting Cleaning | Keep the Tool and Bit in Suitable Condition |
These steps may seem basic. They become particularly useful when several tools and bit types are stored together.
A clear selection process does not need to be complicated.
Start with the drill. Identify its connection system and read the relevant instructions. Then look at the material that needs to be drilled. Once those two points are clear, the range of suitable bits becomes much smaller.
The next consideration is the job itself. A small hole for a household fixture is different from a larger repair task. The bit should be selected for the actual work rather than simply because it is already available in the toolbox.
Storage can also help. Keeping masonry bits separate from wood and metal bits reduces the chance of choosing the wrong tool during a busy project.
Labels are useful when a workshop contains several similar-looking bits. A simple organization system can make selection quicker.
For occasional users, learning a few basic terms can also reduce confusion. Understanding the difference between a standard drill chuck and an SDS connection is often enough to avoid many purchasing mistakes.
Safety should remain part of the preparation. Appropriate eye protection, hearing protection, dust control, gloves where suitable, and other protective equipment should be selected according to the work environment and task. Users should also follow the safety instructions supplied with their tools.
An SDS bit can be a practical choice for compatible hammer drilling work, but its value depends on using the right tool, connection, material, and operating approach together.
Once those factors are understood, choosing and using an SDS bit becomes a much more straightforward part of everyday drilling work.
KEEP IN ToUCH

Rongcheng specializes in manufacturing and exporting wood planer bits, auger bits, shovel bits, spade bits, chisels, hammer bits and carbide, etc.
contact us
Address: Shangbutou, Qingjiang, Yueqing, Zhejiang, China
Tel: +86-577-62271200
FAX: +86-577-62276882
E-mail: [email protected]
Follow us

Carbide Hammer Drill Tools Manufacturer

 English
 русский
 Español
 中文简体
中文简体